In WordPress you can add a tag cloud and they are typically in a widget format that will be in a narrow display for the sidebar.
Challenge is, what if you want to create a full width tag cloud without complicated css or adding another plugin? Here is one way.
- Tag clouds allow your readers to easily search your content by tags instead of categories.
- Tag clouds can help your website rank better in Search Engines.
- Tag clouds can categorize your posts by your tags popularity.
However, one of the challenges is if you wanted to display your tag cloud as a full width section in the footer, not on the sidebar.
There are css codes and stylesheets you can use to enhance your tag cloud, there are even plugins, but if you don't want to use any of those there are not many options.
Example: I created a new widget called "Tag Cloud" then added that as a side bar item to the footer, but it always displayed it in a narrow, widget format.
In Divi theme, you have the option to create custom menus even that still displayed the tag cloud in a narrow, widget format.
So, here is a work around if you would like to create a full width tag cloud footer with Divi Theme.

Steps to Create a Full Width Tag Cloud using Divi Theme
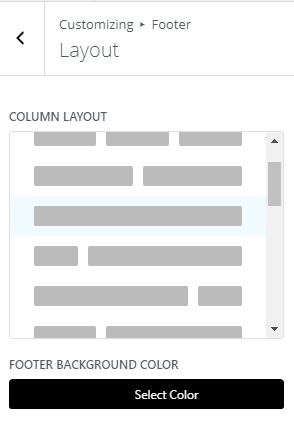
The first thing to be sure of is that your divi theme footer menu is set to full width. Follow these steps.
1. From your left hand WordPress navigation go to Divi -> Theme Customizer.
2. Once the Customizer has loaded, go to Footer -> Layout and be sure your widget is set to full width.
3. Then go back to the 'Footer' menu and click 'Widgets' to set your text colors that will be used in the footer widget.
4. Click 'Publish'.

Create a Tag Cloud Footer Widget
After you are sure that your footer widget is set to full width, create your footer widget.
1. From your left hand WordPress navigation go to Appearance-> Widgets.
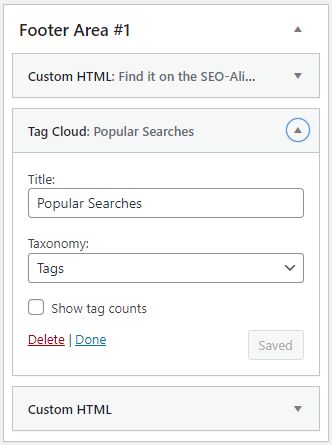
2. Add the Tag Cloud widget to Footer Area #1
3. Title your widget. Here we have named ours 'Popular Searches'.
4. Click 'Save'.
Now go to any page/post on your website and you will now see the full width tag cloud in the footer of your website.

Create Multiple Footer Areas
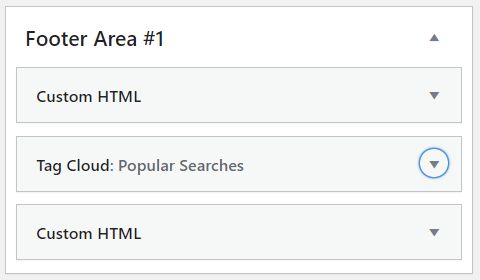
Even though you have chosen a full width footer, you can still add more than one line.
Simply add more widgets into that one footer area to add another.
See our full width cloud tag footer on the bottom of this post.

There is how we added the full width tag cloud that is on the bottom of our posts and pages. There are a few plugins that will allow you to control what posts and/or pages you would like that widget to display on. You can even add your own css style to that as well.
Hope that helps you create your full width tag cloud without complicated css or adding another plugin!
Resource for WordPress Custom CSS Tag Cloud
If you are looking for a great css to customize your tag cloud, here is one that works well. https://bacsoftwareconsulting.com/blog/index.php/web-programming/customize-wordpress-tag-cloud-without-a-plugin/
About the Author:
The SEO-Alien is a project started in 2009 regarding all things online marketing. The site started out more of a diary of predictions, suggestions and references to things I frequently used for online marketing... before social media marketing was even an option.
I hope you find the information and tools presented here useful and something worth sharing with others.
If there is anything else about online marketing or any online advertising strategy you think would be helpful, please let me know.


