Creating a Calculation
Creating a calculation in Ninja Forms has two primary steps:
- Creating the fields on which to base the calculation
- Creating the calculation itself
Any field that can accept a fully numeric input can be used to base a calculation on. Alternatively, any fields with a “Calc Value” in them can also be used in calculations.
The following fields have a Calc Value setting and/or can be used in calculations:
- Single Checkbox: let customers select a single item
- Checkbox List: let customers select one or more items
- Select List: let customers select a single item from a dropdown
- Multi-Select: let customers select one or more items from a dropdown
- Radio List: let customers select a single item from a list
- Select Image: let customers select one or more items with an image
- Number: let customers enter a value
The “Calc Value” of a field is different from its “Value.” A field’s “Value” is what is passed into the final form submission. The “Calc Value” is what is used when that field is called from a calculation.
(Enable Developer Mode in order to display the “Value” field settings.)
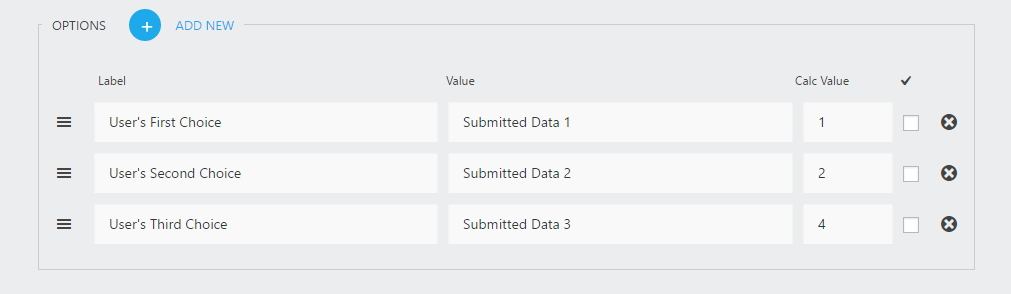
In the screenshot above is an example of a list field’s settings.
- Label – Labels appear to your user on the front end of your form as a choice in the list
- Value – Separate from the label. The value of the list option selected by the user will appear in your submissions, as well as in email or success message if using the merge tag of that field.
- Calc Value – This value will be sent (or totaled and then sent in a multi-select list) to any calculations referencing this field.
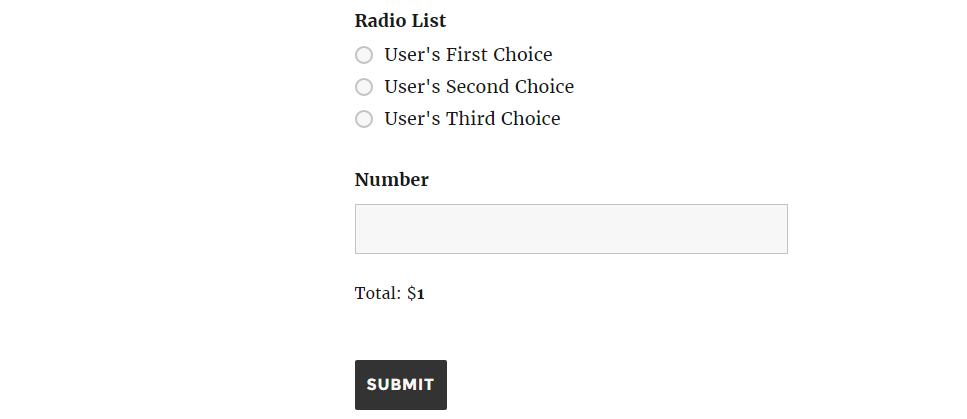
Using the screenshot above as a template, if the user selected both “User’s First Choice” and “User’s Second Choice” on the front end, the saved form data would read “Submitted Data 1” and “Submitted Data 2” respectively. The calc value for the field would be 3 (1 + 2, the sum of the two choice’s calc values).
Single checkboxes also have the “Calc Value” setting.
Once you have added fields to use in your calculation, creating the calculation itself is very simple.
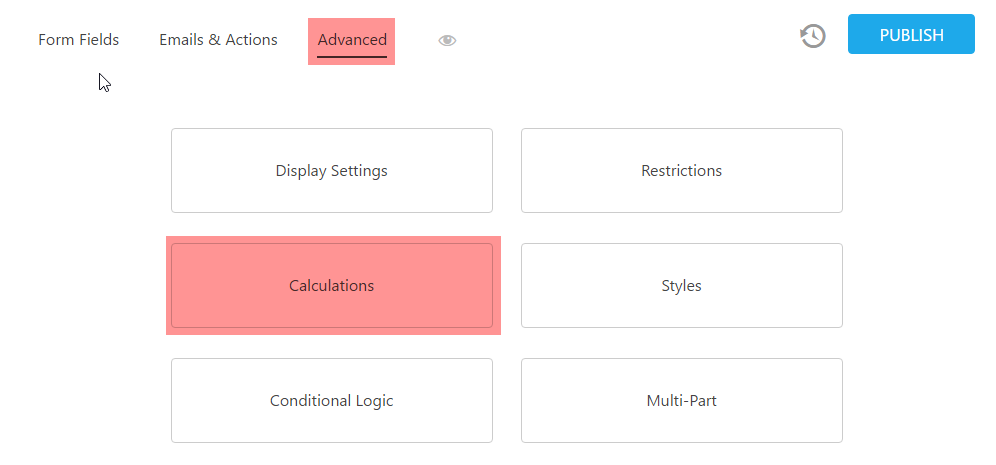
In the form builder, go to “Advanced” and then to “Calculations”:
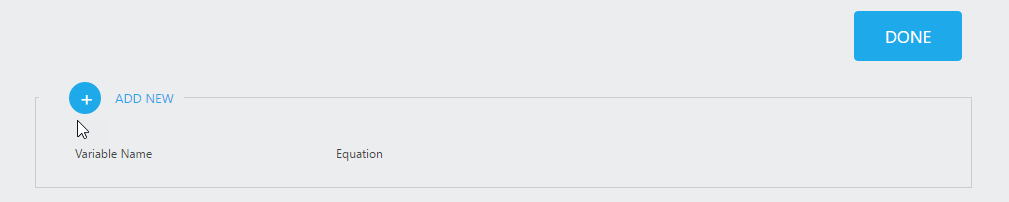
Click “Add New” to add a calculation to your form:
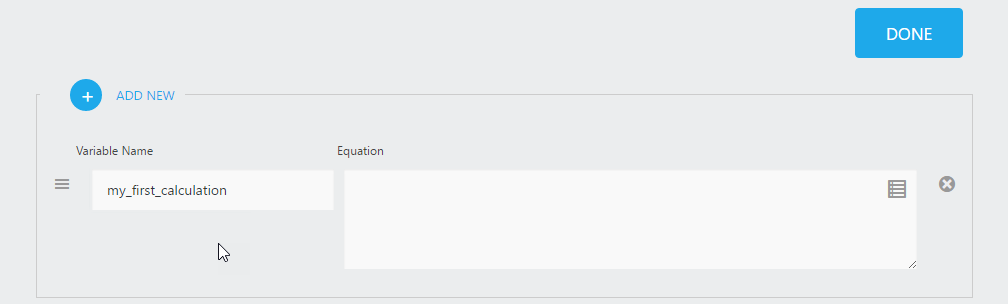
Name your calculation. You will use this name to reference the calculation in other places, including displaying the value in the form itself or in any actions.
No spaces and alpha-numeric characters only should be used in the calculation Variable Name.
example:my_variable, my-variable, myVariable, MyVariable
Now, create the calculation. Using the “Merge Tags” icon in the “Equation” text area, choose the fields that you would like to use in your calculation. In the example below, I’ve added the list field from our example above as well as a number field. You may multiply (*), divide (/), add (+), or subtract (-) any two fields. Order of operations is honored. In our example, however, I am simply adding the two fields together.

You’ll notice that the merge tags in calculation fields add “:calc”, a convention only seen here. This is to let the calculation know to use the “Calc Value” of a field if it exists instead of the normal, submitted “Value.” In the absence of a “Calc Value”, the submitted “Value” will be used instead.
Displaying the Calculation in Your Form
Displaying a calculation in your form is very easy! In the form builder, add an HTML field to your form from the “Layout Fields” section:

Once added, open the HTML field settings and choose the merge tag that matches your calculation name:
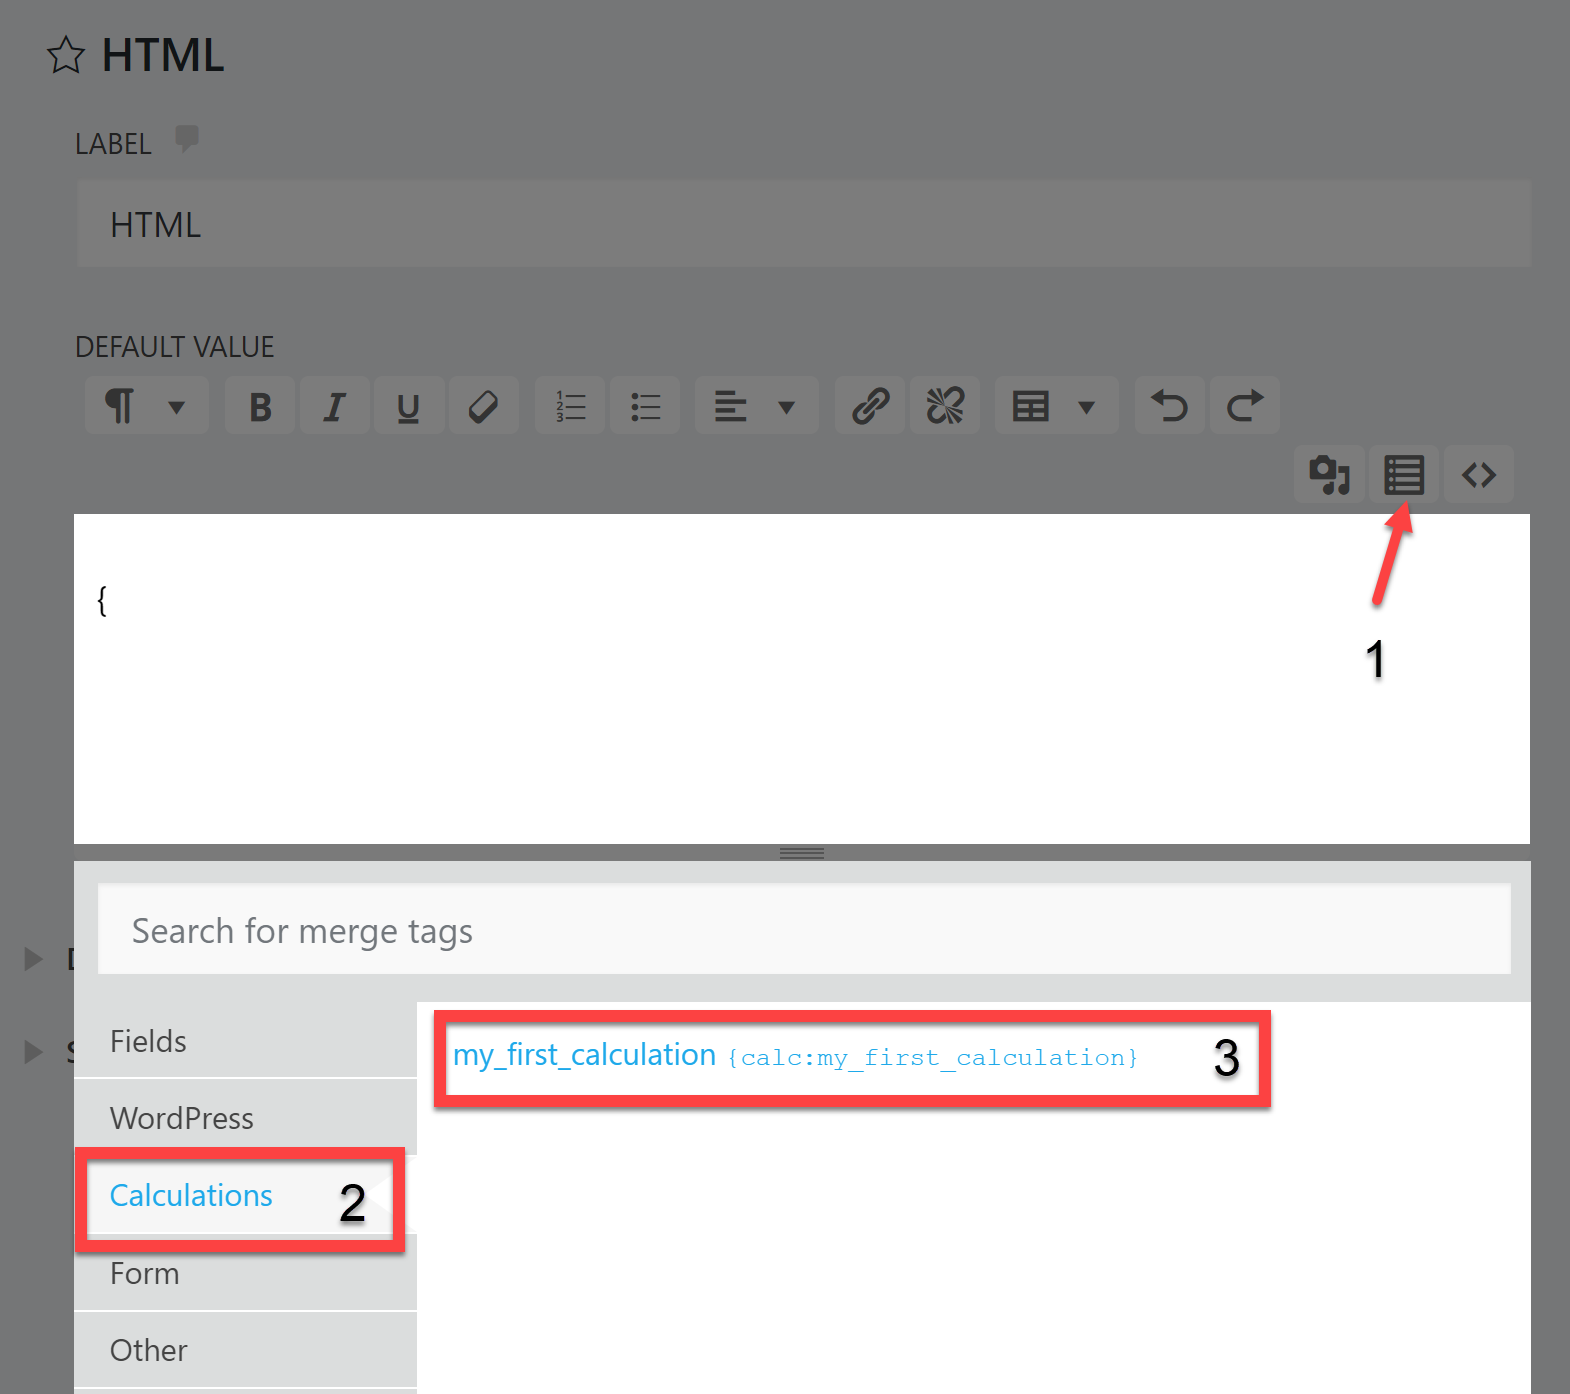
This will add a merge tag to your form beginning with “calc:”, indicating that a calculated value will appear in this location.
That’s it! Preview the form on the front end and you will see your total being displayed. You are free to add a currency symbol, styling, or any other content to the display of your total. It will update dynamically as the form is completed. For example, changing the HTML field to
Total: ${calc:my_first_calculation}
will display in your form like this:
Using a Calculation as a Payment Value
Calculations can be used as the totals sent to any payment gateway connected to Ninja Forms. See the documentation for that payment gateway for details for example the Stripe documentation or PayPal Checkout documentation, and see the section titled Using a Calculation to generate a total.
Advanced Calculation Tips
- Calculations can nest. Any new calculation you add can use any other calculation above it in the list (but never below it). This can allow for some pretty amazing and powerful use cases.
- Calculations can be used to fire actions conditionally with our Conditional Logic addon. This means that based on a user’s answers to questions in your survey, quote request form, etc. that you can send them to different landing pages, contact different members of your sales team, gauge how “hot” your lead is, and more.
- Calculations process during the user session and are dependent on the data as it exists in the live form. This means that the output of calculation merge tags can update when placed in HTML fields while the user interacts with the form. However, it also means that the calculations themselves do not have a definite value when the form is submitted, so calculation merge tags will not populate when re-triggering emails or in exports or PDFs. If you need to save the calculation output as it exists when the form is submitted, you can place it in a Hidden field and then include the Hidden field’s merge tag where you need the calculated value. This will save the calculation output as it existed at the time of submission as a string, enabling it to be reproduced wherever the Hidden field merge tag appears.
Troubleshooting complex calculation setups and mathematical order of operations are outside the scope of support we are able to provide. If you find a reproducible bug, however, please let us know!