
Did you know you can do more with your email notification action than add email addresses? Our WordPress form builder has an extensive suite of email features to customize and improve your email notifications. From customizing to enabling and troubleshooting, here are 22 ways you can use these features to create the email notification experience of your dreams.
1. Change Your Email Action Name
You can rename your Email action to anything you want by replacing the text in the Action Name field. Doing so will help you stay organized when your WordPress form becomes more complex.

2. Pre-populate Email Settings with Merge Tags
Merge tags allow data to be pulled from different sources within WordPress ( including your forms ) that can be applied to pre-populate fields. The To, Reply-To, Subject, and Email Message fields come included with the merge tag feature. Click the merge tag icon to apply form values to those fields.
3. Editing the Email Subject Field
You can add text through merge tags or by typing into the email action subject field. Customizing this field lets the receivers of the action know what has been sent to them.
4. Customizing Your Email Message Using HTML
To format your message, click the “carrots” icon to change the rich text editor into an HTML editor. Doing so will give you the ability to create headers, add lists, apply tables, and much much more. For more information check out our article, on Customizing your Ninja Forms Email.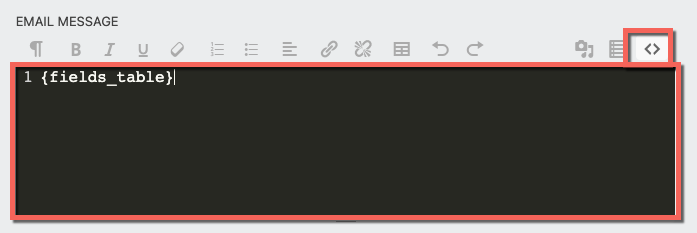
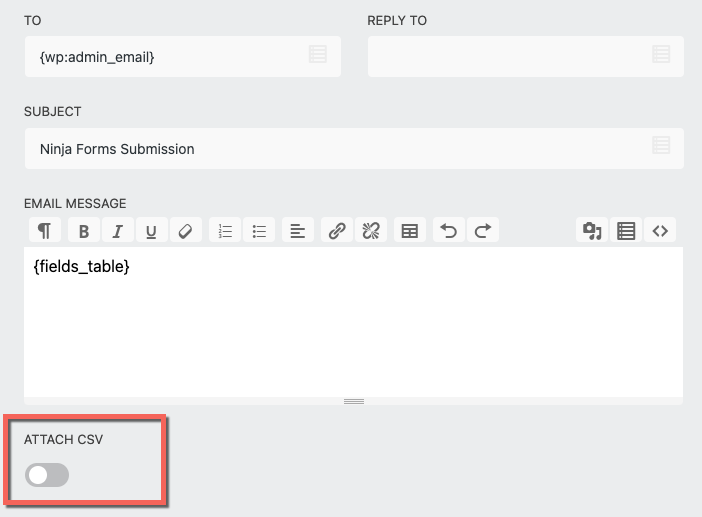
5. Exporting WordPress Form Submissions
Send submissions by enabling the Attach CSV toggle switch. Doing so will attach the latest submitted entry in a CSV format.
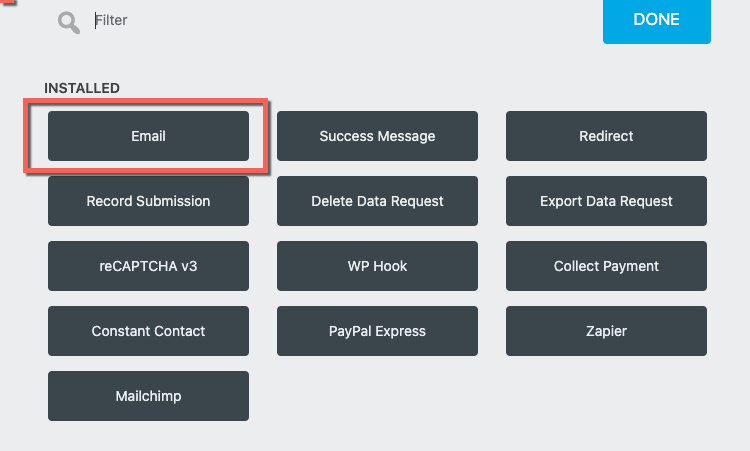
6. Add Multiple Email Actions
By default, each Ninja Forms template includes an Admin Email action. You are not limited to this one action though. You can add as many email actions to your WordPress form as needed. To add additional actions click the plus sign on the bottom-right and select Email.
Doing so will add additional email actions to your form that can then be customized to your heart’s content.
When used in combination with the Conditional Logic add-on, you can create actions that will trigger when certain conditions are met. To find out more, read tip #9. Creating Conditional Emails.
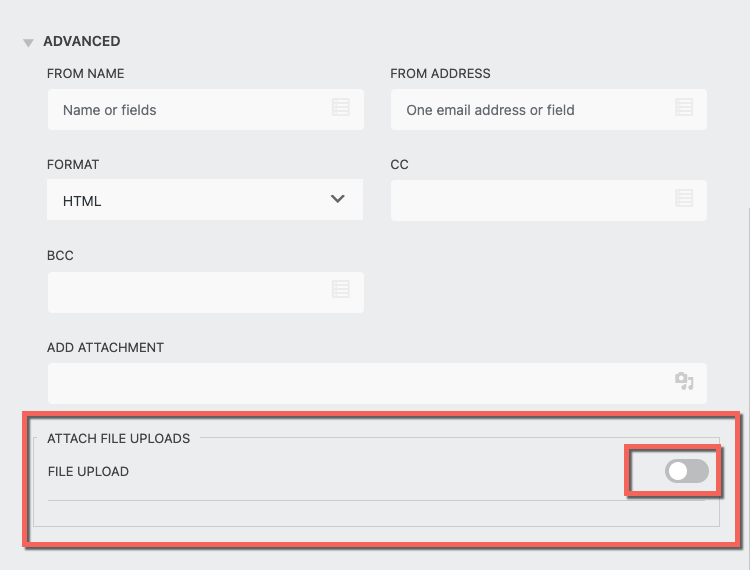
7. Add Uploaded Files to Your Email
To attach file uploads to your email action, add the File Uploads field to your form ( must have the File Uploads add-on ) then, Publish and refresh. Open the email action and look under the Advanced drop-down and you should now see an option to toggle your file upload on or off.
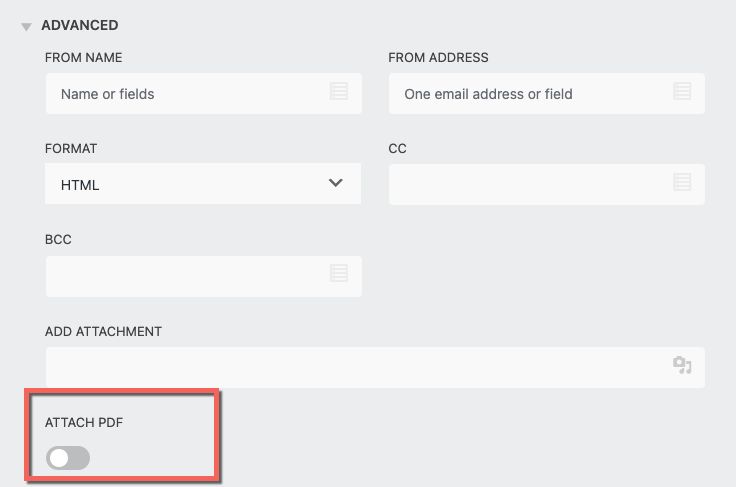
8. Attach Submissions as PDFs Instead of CSVs
The PDF Form Submissions add-on comes with a feature that gives you the option to attach submissions as PDFs. Once the add-on is installed and activated head over to your email action, open the Advanced dropdown, and toggle on the Attach PDF button. For more information check out our article, on Exporting your PDF with WordPress.
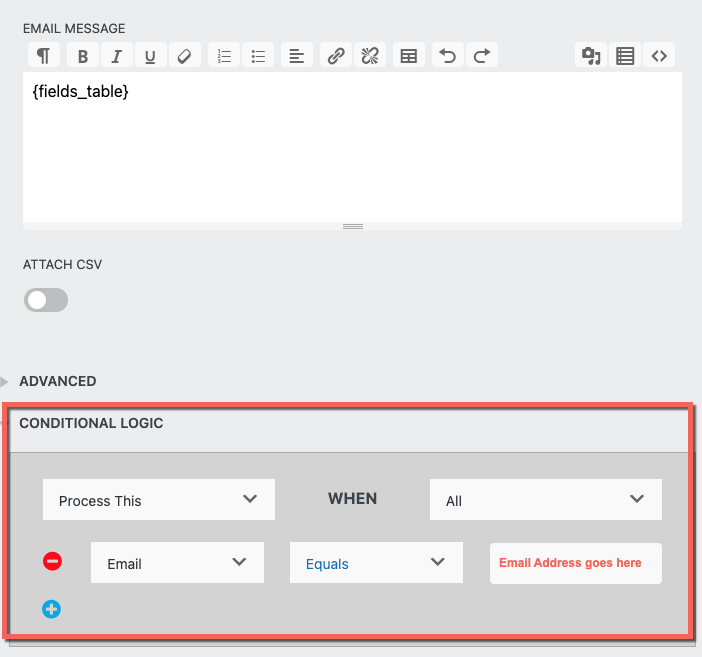
9. Create Conditional Emails
Once the Conditional Logic add-on is installed and activated it triggers conditional settings to appear for all email actions. These settings allow you to build queries that are then applied once the selected condition has been met. For more information, check out our guide on, How to Send Conditional Emails from WordPress.
10. Sending Ebooks
One way of sending an ebook can be done through the attachments field for your email action. To add an attachment from your WordPress media library open the Advanced dropdown and click on the Attachment icon. Doing so will add the attachment to your email notification.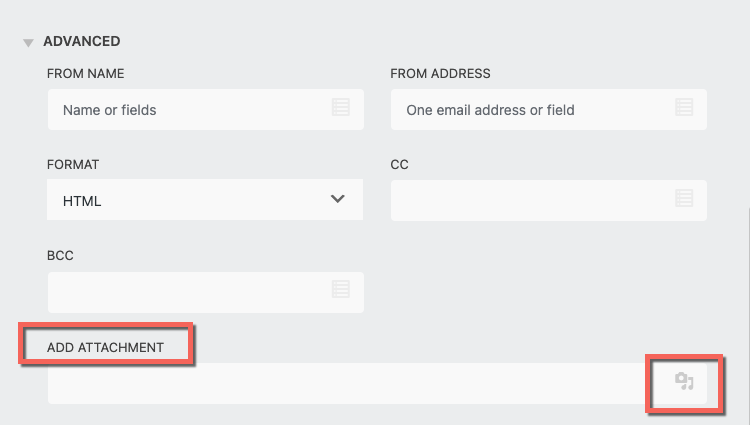
11. HTML Format is the Preferred Format
Most modern email clients use and prefer HTML messages over Plain Text that is why our default format is set to HTML. For more information on our email action, read through our guide on Sending and Email.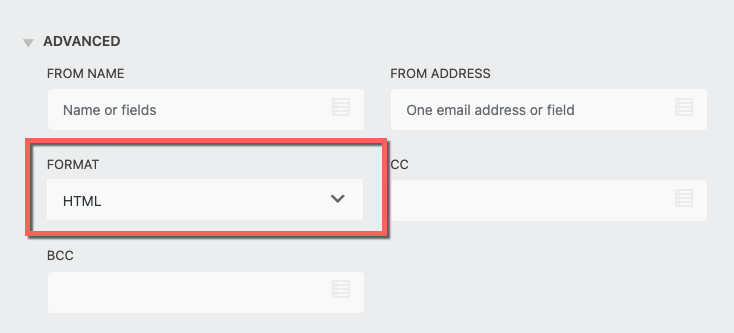
12. Resend Your Email Action
Our WordPress form builder now comes with the ability to resend emails. To try this out, go to Ninja Forms > Submissions > select a form > select an entry > open the Bulk Actions dropdown and pick Trigger Email Action.
All email actions associated with that entry will appear. Open the Select the Email Action dropdown and choose the email action you wish to resend followed by clicking the blue Resend Email button.
This is a great tool if you need to resend an email or troubleshoot a submission issue.
13. Every Email Action Needs 3 Things
At the bare minimum every email action should include the following; a valid email address in the To field, text in the Subject line ( avoid all caps ), and text in the email message. Without these, your email is sure to fail.
14. Gmail Does Not Honor the Reply-To
When Gmail is not honoring the Reply-To field consider adding the From Address ( Email action > Advanced ) instead.
15. If From Address is Blank
By default, if the From Address is left blank it will use the WordPress Admin email. If you are seeing your administrator’s email address in the FROM field of your emails, this is why. To resolve, include an entry in the From Address field. If the issue persists after doing so edit the Administers Email.
16. Deliverability Problems?
The From Address, BCC, and CC settings can cause deliverability problems. Only use them if you are already familiar with what you’re doing, and already know how to avoid these issues
17. Send All Submission Data Even HTML Fields
To include submission data for all fields including HTML replace the {fields_table} merge tag with the {all_fields_table} merge tag in your email message field.
18. Email Errors
When you see, “Your email action [action name] has an invalid value for the [setting name] setting. Please check this setting and try again. when the WordPress Form is Submitted” error. Re-Check the address you have entered into these fields, oftentimes, the email address entered does not exist.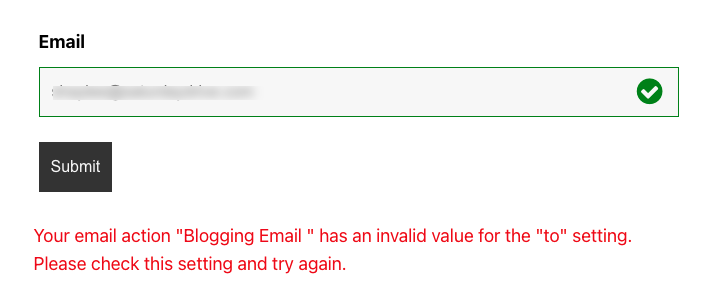
19. Believe it or Not PHP Versions Make a Difference When it Comes to Email.
To make sure you are running the most up-to-date version go to Ninja Forms > Get Help and look for PHP Version. If you are running anything below version 7.4.1, contact your hosting provider about upgrading your version of PHP.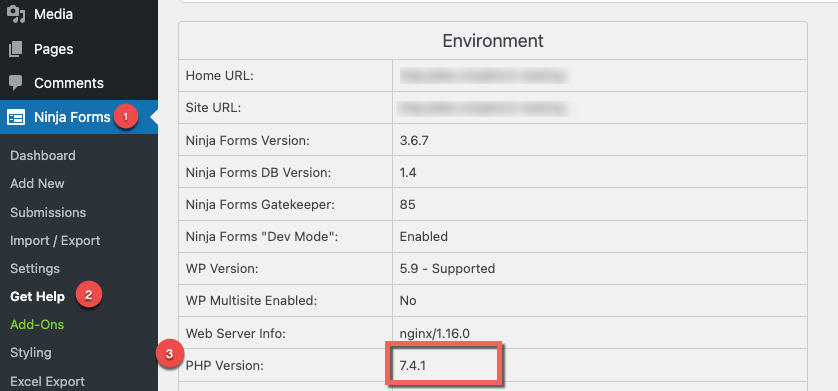
20. Are Your WordPress Form Emails failing?
If your form emails are failing, consider using an SMTP plugin. SMTP plugins pass the email data off to the plugin instead of your host.
21. Hosts are Responsible for Email
90% of problems stem from the web host actually sending the email. If you have set up your email action correctly and enabled an SMTP plugin and your emails are still not getting through, contact your hosting provider for further guidance as Ninja Forms does not send an email, hosts do.
22. Email Troubleshooting Plugins
My favorite free email troubleshooting plugins are Email Log and WP Mail Logging. Both plugins assist you with debugging email-related problems. If you rather not have to worry about troubleshooting SendWP takes over the responsibility of sending all outgoing mail from the WordPress website. If you are having issues with the Ninja Forms email, installing SendWP is all you need to do.
There You Have It! 22 Ways to Use WordPress Form Email Notifications
As you can see, when used with add-ons like Conditional Logic, File Uploads, and PDF Form Submissions you bring additional features to your email action that you wouldn’t otherwise have. Give our add-ons a try today. We offer a 14-day money-back guarantee so what do you have to lose?
Joey Wong says:
Dear Support
How to activate the LineNotify Add-On for Ninja Forms?
Shaylee Hansen says:
Hello Joey,
Currently, we do not offer a product called LineNotify. If you need help with add-on installation, please see https://ninjaforms.com/docs/installation/. Otherwise, I recommend reaching out to our customer support team so that we can further help you: https://ninjaforms.com/contact.